
This puzzle was formerly sold by Crafty Puzzles and is retained as a free reference item. It is no longer available to purchase from this website.
Try a hint before revealing the answer
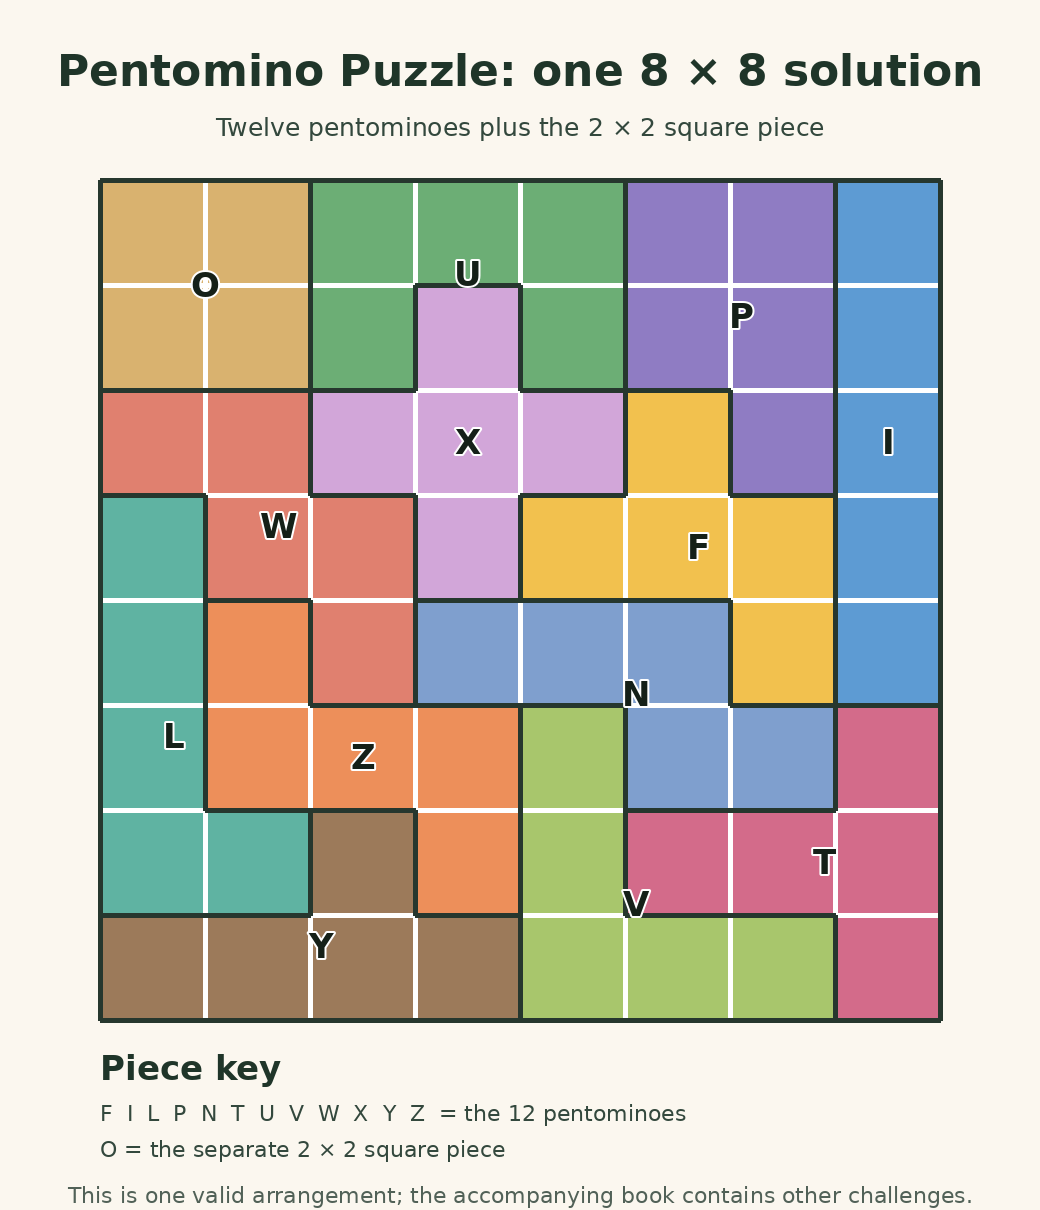
Open one hint at a time to preserve some of the challenge.
Hint 1
Identify the twelve five-square pentominoes and the separate 2 × 2 square piece.
Hint 2
In the displayed arrangement, the 2 × 2 square starts in the top-left corner and the long I piece runs down the right edge.
Hint 3
Fill the centre with X, F, W and N before completing the two lower corners.
Written assembly guide
- Place the 2 × 2 square piece in the top-left corner of the tray.
- Run the straight I pentomino vertically down the far-right edge.
- Fit U and P across the remaining top edge, then place X below the U.
- Build the middle with W on the left, F beside it and N across the centre-right.
- Place L down the lower-left edge, Z beside it and T against the lower-right edge.
- Complete the bottom with Y and V, then check that every square of the 8 × 8 tray is filled once.
Use the preserved diagram or video alongside these steps for exact orientation. The written guide is an original summary prepared for this archive.
Complete Pentomino Puzzle solution
This original diagram gives one valid way to pack the twelve pentominoes and the separate 2 × 2 square into the 8 × 8 tray. It does not reproduce the other challenges from the original booklet.
Reveal the Pentomino Puzzle solution diagram
Select the diagram to open a full-screen zoomable view. The original file is also available for printing.
Source and verification
- Archive source
- Original Crafty Puzzles product photograph and an original exact-cover arrangement
- Information checked
- 13 June 2026
- Verification status
- The displayed 8 × 8 packing was generated and checked to use every piece exactly once
- Page status
- Original Crafty Puzzles URL preserved


